How to use ambient occlusion
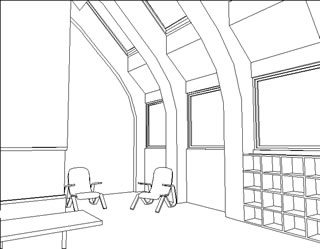
Figure 1.5.3: A hidden line drawing of an interior scene.
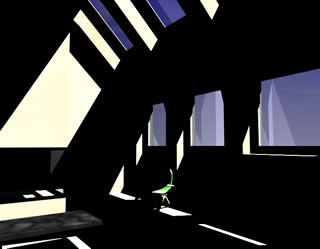
Figure 1.5.4: The scene rendered with no Ambient Light.
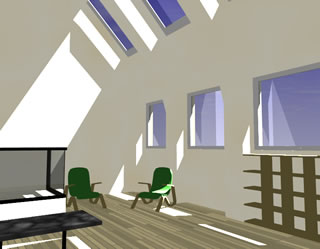
Figure 1.5.5: The scene rendered with 70% Ambient Light.
There are two different scenarios, where ambient occlusion can be helpful. The first is a scene where there is not enough light, such as an interior, where only sun light shines through windows. A hidden line rendering of such a scene is shown in Figure 1.5.3. Improving this rendering with ambient occlusion is a simple three step process.
The first step is to render the scene with just the sun light and Ambient Light set to 0%. This rendering is shown in Figure 1.5.4.
In the second step the Ambient Light is set to a much higher value. It may require one or two quick test renderings, but the goal is to determine, how intense the brightest (least occluded) surfaces in the scene should appear. Typically, the Ambient Light is set to values between 50 and 80%. The rendering in Figure 1.5.5 has Ambient Light set to 70%.
For the first two renderings it is OK to use methods for creating fast renderings. For example, one can use a small window, turn off layers with objects that are not critical to the rendering, but have a high number of faces, and/or turn off Reflections and Transparencies in the RenderZone Options dialog. The reason for these two renderings is to determine how the scene looks without any ambient light and with maximum ambient light.
In the third step, ambient occlusion is added. Any shortcuts for faster renderings in step 1 and 2 should now be reversed. In the RenderZone Options dialog, Use Ambient Occlusion is selected, in the Global Illumination tab. The appropriate items are selected from the Scene Size and Quality menus. The default quality level of 3 works well for average scenes. More detailed parameters can be found and set in the Ambient Occlusion tab (Figure 1.5.2).
Recall that the Contrast slider determines how dark a point becomes, if it has maximum occlusion. When set to 100% and a point is completely occluded, it is rendered as dark as if there were no ambient light, as in step 1. When set to 50%, the same point gets 50% of the ambient light that was added in step 2. In other words, with the Contrast slider it is possible to determine how dark occluded areas become. The renderings in step 1 and step 2 represent the extremes, full ambient illumination and no ambient illumination.
The option selected from the Distance menu determines how far away from a point another object can be to qualify as an occluder. If Small, Medium, or Large is selected, the distance is set automatically, depending on the selection from the Scene Size menu. It is also possible to enter a different value by choosing Custom from the menu. One can think of the Distance value as an indicator of how far from a corner the dark, occluded region will reach into the illuminated surface. The larger the value the further the dark region will stretch into light areas. A good value for interior scenes is a distance that is about half the ceiling height.
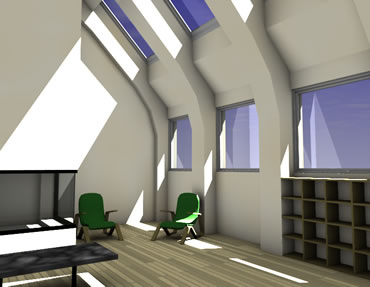
For example, for a room with 10' ceilings, 6' works well. It is best to choose the Large option from the menu for interiors. Figure 1.5.6 shows the scene now rendered with ambient occlusion, using 100% Contrast and the Large Distance option. Note that the corners of the room now show darker regions, whereas the large wall areas remain bright. The darkest area is inside the shelf on the bottom right of the image, since the small openings have the most occlusion
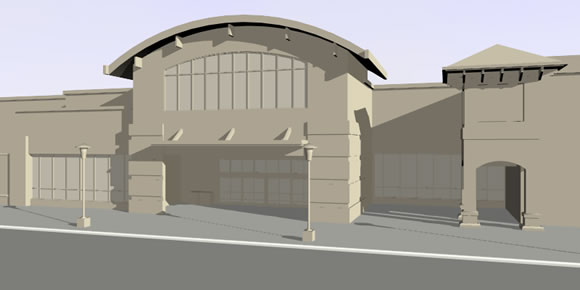
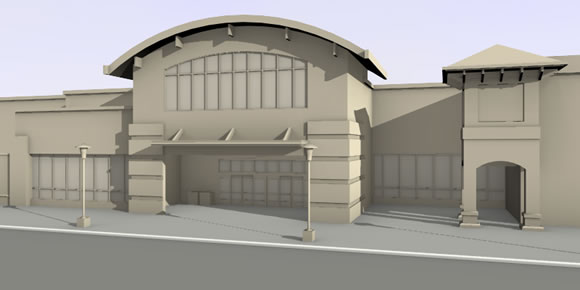
A second scenario may be a scene that already has sufficient light before adding any extra ambient light. This may be the case in a rendering of an exterior of a building. Such a rendering may suffer from the lack of contrast in areas of small detail, as is shown in Figure 1.5.7(a).
The sun light illuminating the scene causes equally bright areas everywhere, which makes it difficult to distinguish elements on the facade. Since little or no ambient light was added to the scene, the Contrast slider cannot be used. For this scene, the Additional Contrast slider needs to be increased. Instead of illuminating a point between no and maximum ambient light, the Additional Contrast simply adds extra darkness to occluded areas. A fully occluded point would render as black, if the Additional Contrast is set to 100%. The exterior scene shown in Figure 1.5.7(b) was rendered with the Distance set to Medium and Additional Contrast set to 50%.
The Falloff slider allows for additional control of how quickly the dark region in a corner becomes lighter as it reaches into a surface. If it is set to 0%, the dark region stays dark further out, giving the impression of stronger contrast. If it is set to 100%, the dark region becomes light very fast and only very tight spaces remain dark. For most scenes, the default value of 50% works well. The interior scene from earlier, rendered with 50% Falloff, is shown again with values of 0% and 100% in Figures 1.5.8(a) and (b).
|
|
|
|---|
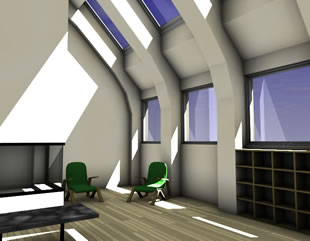
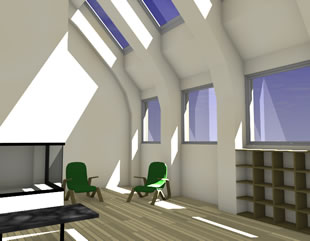
Figure 1.5.8: Ambient occlusion with (a) 0% and (b) 100% Falloff.