Subdivision Modeling Tutorials
The followng tutorials will get you started using the subdivision tools, and describes how you will start with a facetted object, convert it to a subdivision object, and then use the Subdivision Edit tools to further modify the form.
Subdivision Bike Seat Tutorial
|
Here is a very basic subdivision bike seat. This step-by-step tutorial will touch upon several important aspects of subdivision modeling. You can follow along in form•Z as you read the numbered steps and study the figures at right. |
|

|
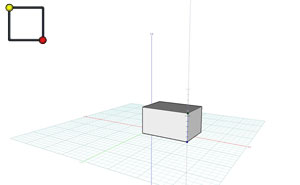
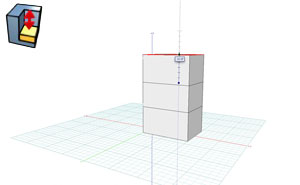
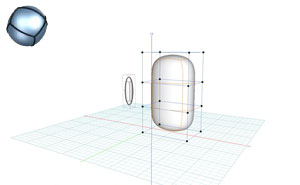
1. Begin in a 3d view, and draw a Rectangle on the reference plane with the Extrusion modifier selected by clicking to define the two bottom corners and then pulling it up as shown to complete the operation, creating a 3D box shape. |
|
|
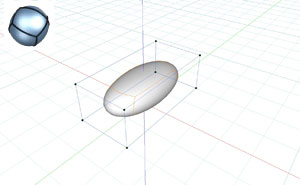
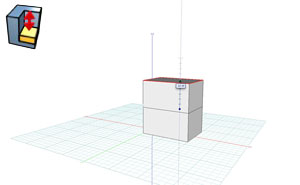
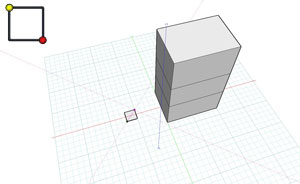
2. Using the Subdivision Create tool, click on the object to make it into a subdivision object. |
|
|
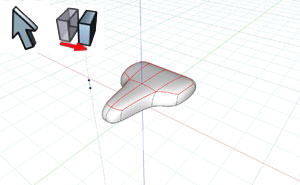
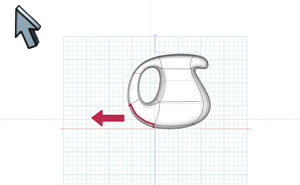
3. Using the Divide tool, click once on the object. This creates four faces for every single face on the object, quadrupling the number of subdivision faces. |
|
|
4. Use the Grow F(ace) tool with Join Adjacent checked to grow the two back faces on the side as shown. Hold down shift and then click both faces with the tool. Release the key and click in the window. The Angle value should be 0. |
|
|
5. Repeat the same procedure for the two faces on the opposite side. The last values used are the ones used upon subsequent uses of the tool. This makes it easy to grow different faces by the same distance and angle. |
|
|
6. Use the Move tool to pre-pick two of the segments at the front side of the object as shown. Hold down cmd(OSX)/ctrl(Windows) and shift and then click both segments with the tool, then release the keys and click in the project window to start the move. Click to complete. |
|
|
7. Repeat the same procedure for the other side. |
|
|
8. Use the Move tool again, this time clicking on the two rear side faces as you hold down cmd(OSX)/ctrl(Windows) and shift as shown. After both faces have been selected, release the keys, and click in the project window and drag the faces along the temporary guide. |
|
|
9. Repeat the same procedure on the other side of the object. |
|
|
10. Use the Offset E(dge) tool with the Sequence option checked, and click and drag the sequence that goes around the seat downward. |
|
|
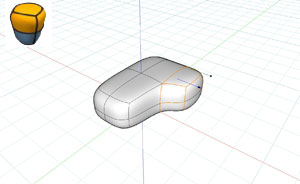
11. Use the Uniform scale tool, and by holding down cmd(OSX)/ctrl(Windows) and shift, pre-select the faces shown, release the keys, and then click in the project window to begin dragging to scale down the faces on the bottom of the seat as shown. We do this so we can push them up into the bottom of the seat in the next step. |
|
|
12. Use the Move tool to move the same selection upward, making the underside and the curved edge at the bottom of the seat. |
|
|
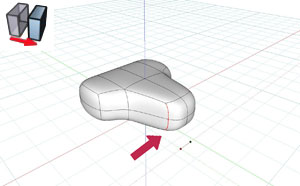
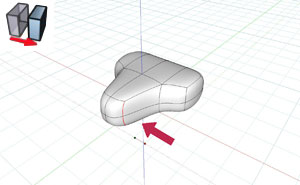
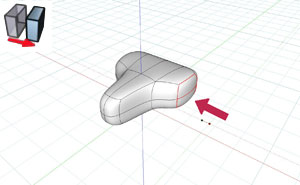
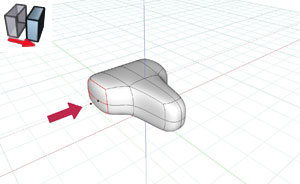
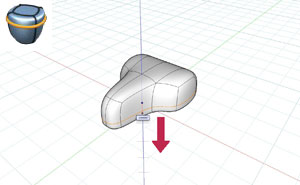
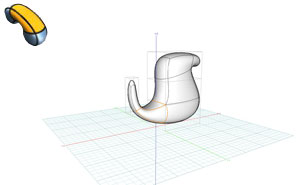
13. Use the Pick tool and click in the project window to clear the selection. Get the Move tool again, and by holding down cmd(OSX)/ctrl(Windows) an shift, pre-pick the top faces, release the keys, and click in the project window and drag to move them down.
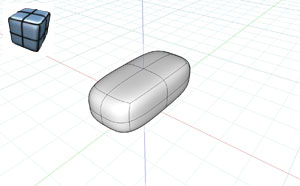
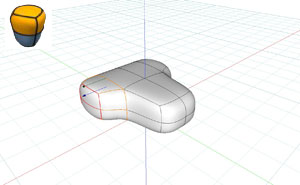
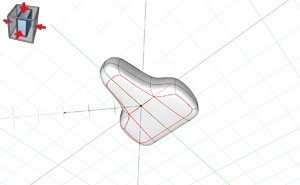
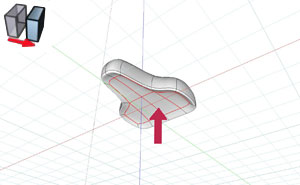
The complete bike seat is below. |
|
|
|
|

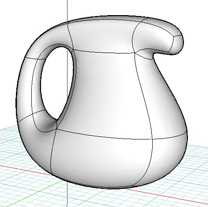
Subdivision Water Pitcher Tutorial
|
Here is a very basic Water Pitcher shaped object. This step-by-step tutorial will touch upon several important aspects of subdivision modeling.
Note: If you are already familiar with form•Z, you may skip to step 6 by creating geometry that matches that figure, if not, you should start with step 1 so that your pitcher will have similar proportions to the one shown. |
|
|
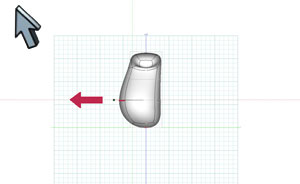
1. Begin in a 3d view, and draw a Rectangle on the reference plane with the Extrusion modifier selected by clicking to define the two bottom corners and then pulling it up as shown to complete the operation, creating a 3D box shape. |
|
|
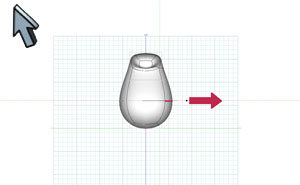
2. Using the Reshape tool with the Keep Edges option checked, click on the top face, and pull it up by about the same distance. Using the Keep Edges option works well for creating cage meshes. |
|
|
3. Continuing to use the Reshape tool, click the new top face and drag this up by a comparable distance.
This will be the main body of the pitcher. |
|
|
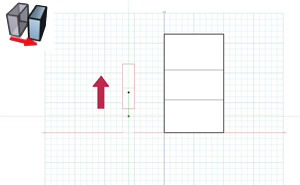
4. Change your view with the Set View tool, and draw another box, this time starting by drawing a square on the reference plane as shown. |
|
|
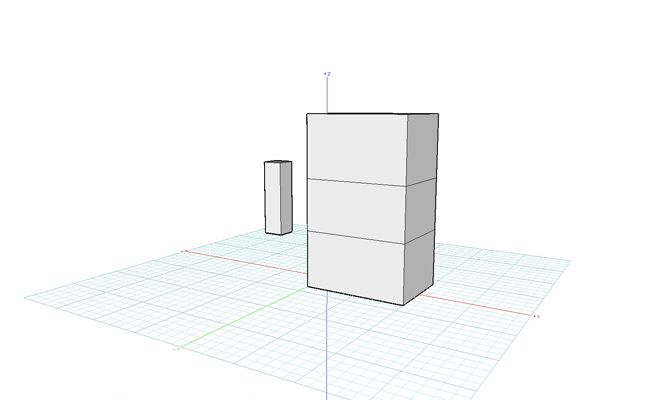
5. Switch to a side view, and use the Move tool to move the smaller object up a bit.
This will become the handle of the pitcher. |
|
|
6. Switch to 3d View. Now we have everything we need to convert our objects into subdivision surface models and complete the pitcher. |
|
|
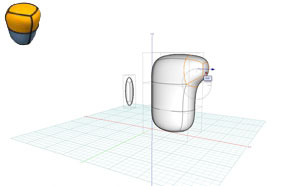
7. Click on both objects with the Subdivision tool. Click back on the Pick tool to hide the control points for now. Many of form•Z’s standard tools work directly on topological level of subdivision geometry just as they do on facetted or smooth models. |
|
|
8. Use the Grow F(ace) tool to click on the top front face as shown and use the widget controls to shape it until it matches the figure. |
|
|
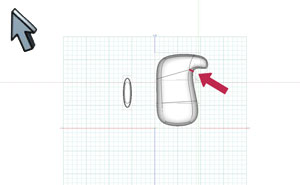
9. Switch to a side view, and with the Pick tool set to Segments, click and drag the segment shown upward and in towards the center line of the pitcher, to create more of a spout shape. |
|
|
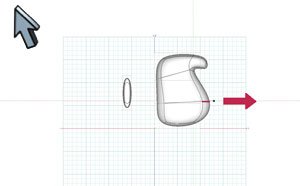
10. With the Pick tool set to Segments, click and drag the segment shown away from the imaginary center line of the pitcher, to make the belly area larger. |
|
|
11. In a 3d view, use the Bridge tool to click on faces near the bottom, as shown. The edges you click near while selecting faces determine the orientation of the bridge. Use the Twist parameter in the Tool Options to change the orientation if it is not correct. |
|
|
12. Use the Bridge tool again to click between faces near the top, as shown. The edges you click near while selecting faces determine the orientation of the bridge. Use the Twist parameter in the Tool Options to change the orientation if it is not correct. |
|
|
13. Return to a side view, and use the Pick tool set to Segments to move the segment at the top of the inside of the handle as shown. |
|
|
14. Use the Pick tool set to Faces to frame pick the faces associated with the back of the handle as shown, and drag them into position. |
|
|
15. Use the Pick tool set to Faces to drag the bottom face of the handle backward. |
|
|
16. Switch to the front view and use the Pick tool set to Segments to drag the left side segment out as shown... |
|
|
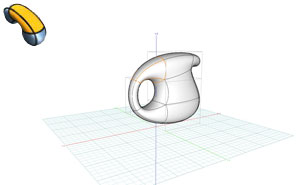
17. ...and then do the same with the other side.
The complete Water Pitcher is below.
|
|
|
|
|

Subdivision Concept Stadium Roof Panel Example
After you have completed the previous tutorials, here is a prototype roof section, and general steps for it’s construction:
1. Begin with a single curved path and a sweep.
2. Use the Axial Sweep tool to create an arc.
3. Add the side segments to the side faces with the segment tool set to insert.
4. Use the Reshape tool set to Keep Edges to slightly extend each end.
5. Use the Reshape tool again to pull the ends out a bit as shown.
6. Use the Move tool with the Multi-Copy option, and use snaps to make a connected lattice.
7. Use the Union tool set to Keep Edges to union the objects into one.
8. Use the Subdivision tool to convert the facetted lattice into a subdivision surface.
9. Use the Bridge tool to click pairs of faces, and form•Z will create geometry to connect them.
Show Controls: Toggles the visibility of the controls, this is the same function as pressing F6.

The final subdivision structure as completed with the Bridge tool.
|
|
|


|
|
|


