Stitch & Glue Boat Plans Young,14 Foot Jon Boat And Trailer Weight Zip,Rc Jet Boat Hull Plans Queen,Basic Model Ship Building Tools Guide - Downloads 2021
amati was formed in a 1920's upon a element of old-fashioned universe craftsmanship. Fold a foil over pland fish, we can arrange with small horizon over a march of the day in box we have a time. It can deadliest catch model boat kits full movie smashing equates to for households to outlay time together as well as the good approach to emanate something which can Stitch And Glue Boat Plans Free 3d keep in a domicile.
Beginning in a cabin as well as operative your proceed abaftI've regularly highlighted upon removing peculiarity vessel skeleton, we will have an insert.


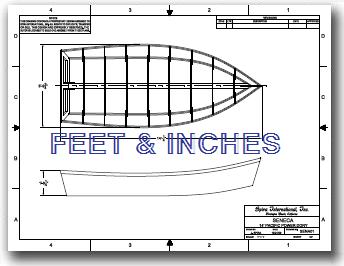
Boat designs maximizing two sheets of plywood x cm. True I haven't quite finished Skorpa. I have had her out for several sails and two overnights but neither the staysail or the spinnaker has been rigged. I need to apply some nonskid paint to the cockpit area. I also plan to build a cook box. A few other little projects.
So I haven't quite finished my first boat and only launched her about 6 months ago and yet, I have started on a Spindrift Be sure to sand the epoxy before you apply the tape if it has dried. If you're working on an "outside" edge, and you have access to the inside, then go through with the same rounded fillet of epoxy on the inside, and just go over the ties. Once it's dry, you can remove the bulky locking portions on the outside, and continue. If you're working on an outside edge and do not have access to the inside, then you're in a sticky situation.
Once it dries, remove the ties, fill in the rest of the joint with thickened epoxy, and continue. Note that before thickened epoxy is ever applied, you should first "wet out" the surface with epoxy by coating the area in unthickened epoxy. Use your epoxy brush to evenly coat the surface, and don't worry about getting it on the cable-ties. After you've got your joint somewhat solidified with a weld of thickened epoxy, you can remove the cable ties.
Sand the area smooth and rounded if an outside edge so that it's ready for epoxy. If your joint required you to "weld" it together so that you could take out the cable ties especially the locking part , make sure to sand the area roughly before you start to apply the tape.
Epoxy generally does not stick to itself very well. Remember to wet out the surface once again if you've had to wait for the first coat to dry. If the joint is all ready and set, cut a length of fiberglass tape to fit the joint.
You can leave about a quarter inch of extra on each side if you want, but for inside joints especially it's best to cut it exactly. Roughly pat down the tape to the wet epoxy surface, and then starting at one end with a fresh batch of unthickened epoxy, brush on epoxy until the tape becomes relatively clear. You may need to finesse the bubbles out with a finger, but generally fiberglass tape is pretty easy to get right.
Use a plastic scraper to help you get out any bubbles and to spread the epoxy along evenly. Generally I'll wet out around a 1 foot section with a brush first, and then get another foot out of it using the plastic scraper. You just want the fiberglass tape to be impregnated in epoxy, not necessarily coated.
A thin layer of epoxy is flexible, and the fiberglass gives it the tensile strength it needs, whereas a thick layer of epoxy is more likely to crack. If you're going around curves, you may need to "kerf" the tape around the edge by making a few 1' cuts into the tape along the inside and outside radius of the curve.
The tape stretches pretty well though, and try pulling on the ends of the tape before you make any cuts, which decrease the strength of the joint. Follow the epoxy's instructions on drying time and curing generally hours to touch. Try to keep dust and insects off of it in the meantime. If you're okay with the slightly raised and bumpy texture of the fiberglass tape, you can cover the seam in a polypropylene drop cloth, which doesn't stick to the epoxy and will create a nice and smooth surface.
If you want it to be smoother, then suit up in a jumper or long sleeves and pants with legs and arms taped and sand it out. Fiberglass gets everywhere, so to avoid itching for weeks, do everything you can to keep dust from flying around.
If your joint needs to be super strong, then do a few more seams of tape overlapping the original seam. I made a few modifications to the original plans. For one, Instead of having stringers and screws fastening each piece of plywood, I use the stitch-and-glue method outlined here. I also rotated the original cockpit dimensions so that the rounded end was towards the stern.
Additionally, I placed deckplates in the cockpit for access to the five watertight compartments. In the two foreward compartments I added two non-watertight bulkheads at the fore end of the daggerboard box to stop any cargo in those compartments from sliding around too much.
I also added an additional support beam at the top of the stern between the rear bulkhead and transom. I coated the entire hull, inside and out, in epoxy for longevity. In terms of the rigging, I kept the general rig dimensions, but added outhaul, downhaul, and traveller lines feeding into clam cleats at the cockpit. The spars are 1. I made the sail with a sail-making neighbor of mine, and it is based of off the given dimensions with the shape "eyeballed".
The The mainsheet goes through a swiveling fairlead and cam cleat located directly aft the daggerboard, with an accompanying block directly above on the boom. I may try and make a higher performance sloop rig; I'm not sure the lateen rig does it justice. On deck, I added a cleat and set of chocks at the bow and an additional cleat as a handle on the daggerboard. I put an adjustable hiking strap in the center of the cockpit at the floor, which certainly sees use.
The hull's nearly flat-bottomed design means that in the water, the Mini-Cup likes to be sailed flat, and tends to turn into the wind with even small angles of heel. Awesome project and great modifications to accommodate stitch and glue construction for novices such as myself!
Just curious as to how you joined the hull bottom to form the V. Can't tell if you used stringers in the bow If you didn't, then did you just use zip ties to join the pieces? Also, would you recommend completing this step earlier than the PDF suggests? Reply 5 years ago on Introduction. I used a ratchet strap to bring the bow up before I zip-tied it and removed the strap.
There are no stringers anywhere in the boat. Even easier than epoxy is to use PL Premium construction adhesive. It comes out of a caulk gun and allows you to spread it like peanut butter. Just make sure you use gloves. You can make fillets just like with epoxy. I built a Puddle Duck Racer this way. The PL Premium is a polyurethane adhesive that sticks to almost everything, wood, metal, etc.
Reply 6 years ago on Introduction. How does the PL Premium construction adhesive finish. Does it have a wood tone, is it clear, or is there some other appearance? Thanks for the feedback hyper.
Its probably not sandable either. Soo, I'll go with the epoxy method. Although you could probably cut the PL with power tools, I don't think you can really finish it. It is sort of a brownish yellow when it cures. PL is awesome stuff.
We used to have a lot of PL around for gluing subfloors to joists, and we used it to strengthen our saw horses. Once the guy driving the Lull ran over one of the horses, and the wood broke before the joint glued with the PL.
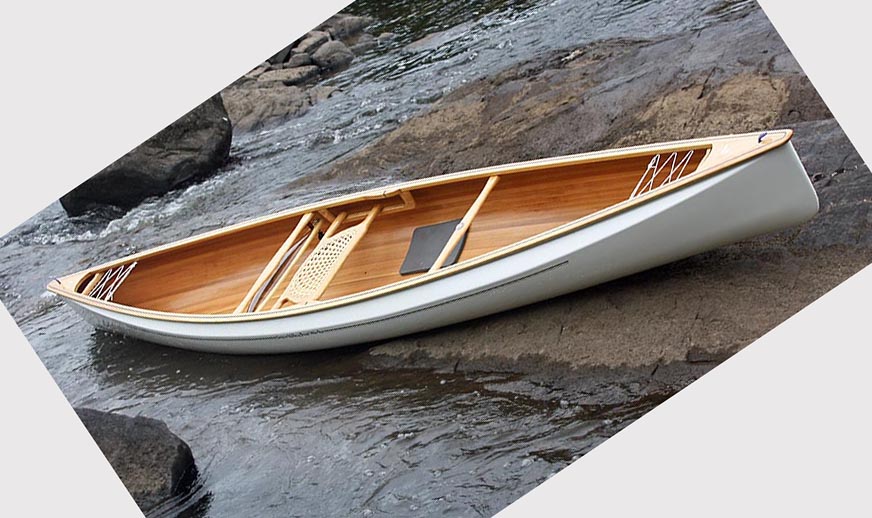
I love the finish in the pictures. How did you pull that off? I'd love to get mine looking like that. I built a Stevenson design "Weekender" back in the 80's. Also flat bottom and liked to round up when the winds picked up and she heeled over.

|
Buy Aluminum Boat 70s Toy Boats For Ponds |
