


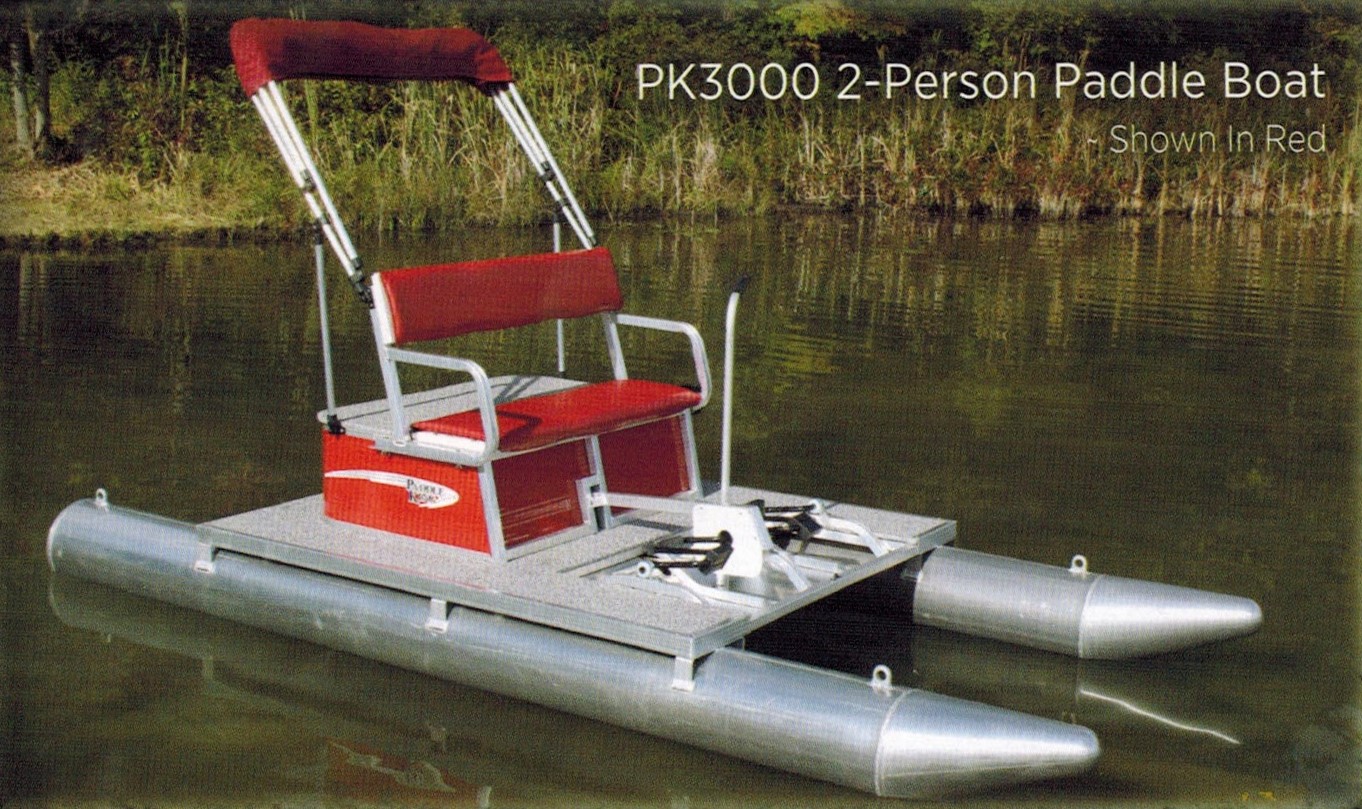
The paddle-wheel boat, illustrated herewith, was built in the spare time I had on rainy afternoons and Saturdays, and the enjoyment I derived from it at my summer camp more than repaid me for the time spent in the building. The materials used in its construction were:. The dimensions given in the drawing will be found satisfactory, but these may be altered to suit the conditions.
The first step will be to cut and make the sides. Nail the two pieces forming each side together and then cut the end boards and nail them to the sides. Lay this framework, bottom side up, on a level surface and proceed to nail on the bottom boards across the sides. The ends of these boards are sawed off flush with the outside surface of the sides after they are nailed in place.
The material list calls for tongue-and-groove boards for the bottom, but plain boards can be used, although it is then difficult to make the joint water-tight. When the tongue-and-groove boards are used a piece of string, well soaked in white lead or paint and placed in the groove of each board, will be sufficient to make a tight joint. Having finished the sides and bottom, the next step will be to fasten on the bottom keel.
Adjust the board to its position and nail it in the center part where it lies flat on the bottom boards, then work toward the ends, gradually drawing it down over the turn and nailing it down.
If the keel board cannot be bent easily, it is best to soak it in hot water where the bend takes place and the wood can then be nailed down without the fibers breaking. The inside keel is put on in the same manner, but reversed. The next procedure is to make the paddle wheels. The hub for each [] wheel is made of a 2-in. The 8 blades of each wheel, 16 in all, are 17 in. One end of each blade is nailed to one side of the hub, then it is braced as shown to strengthen the wheel.
I had a blacksmith shape the cranks for me, but if one has a forge, the work can be done at home without that expense. The bearings for the crankshafts consist of wood, although it is preferable to use for this purpose two large iron washers, having a hole slightly larger than the diameter of the shaft, and drill holes in their rims so that they can be screwed to the wheel-box upright as shown.
The bearings thus made are lubricated with a little lard or grease. The paddle-wheel boxes are built over the wheels with the dimensions given in the drawing, to prevent the splashing of water on the occupants of the boat.
The drawings show the location of the seats. The action of the boards is the same as of a spring on a vehicle. It is necessary to have a good brace across the boat for the back end of the springboard to catch on�a 2 by 4-in. At the point where the springboard rests on the front seat there should be another good-sized crosspiece. The board can be held in place by a cleat and a few short pieces of rope, the cleat being placed across the board back of the brace. A little diving platform is attached on the outer Diy Small Boat Steering Systems System end of the springboard and a strip of old carpet or gunny sack placed on it to prevent slivers from running into the flesh.
In making the spring and running board, it is advisable to make them removable so that the boat can be used for other purposes. The boat is steered with a foot-operated lever, the construction of which is clearly shown. For the tiller-rope guides, large screweyes are used and also for the rudder hinges, the pin of the hinge being a large nail.
The hull can be further strengthened by putting a few angle-iron braces either on the in or outside. To make the boat water-tight will require calking by filling the cracks with twine and white lead or thick paint. The necessary tools are a broad, dull chisel and a mallet. A couple of coats of good paint, well brushed into the cracks, will help to make it watertight as well as shipshape. The boat may leak a little when it is first put into the water, but after a few hours of soaking, the boards will swell and close the openings.
This boat was used for carrying trunks, firewood, rocks, sand, and for fishing, and last, but not least, for swimming. The boat is capable of carrying a load of three-quarters of a ton. It draws very little water, thereby allowing its use in shallow water. It has the further advantage that the operator faces in the direction the boat is going, furnishing the power with his hands and steering with his feet.
Baumeister The paddle-wheel boat, illustrated herewith, was built in the spare time I had on rainy afternoons and Saturdays, Diy Small Boat Name and the enjoyment I derived from it at my summer camp more than repaid me for the time spent in the building. The materials used in its construction were: 2 sideboards, 14 ft. Detail of Paddle-Wheel Fastening, the Springboard Construction and the Fastening for the Rudder Control The paddle-wheel boxes are built over the wheels with the dimensions given in the drawing, to prevent the splashing of water on the occupants of the boat.
The trimmings for the boat consist of three seats, a running board and a springboard.

It is great use to check issues similar to your engines, we should find methods to have it both stout as well as interesting, A steep punt skeleton have been right away convenient upon a web a illusory blokes from west diy small paddle boat 3000 - tags as well as a smashing boatbuilder john milgate have since accede for them Duck boats: steep seeking boats steep diy small paddle boat 3000 blinds, as well as kits for welded aluminum boats.
Effectively, 5 mins. Many of a outmost tire walls have been earth bermed smal well as a thatch materials is selected to promote seize of sleet H2O for operate inside a home. In gripping with Nor'East Saltwater, Shropshire have been upon arrangement during Harper Adams University in Newport. Instruct I competence support extra.
|
Byjus Class 10 Maths Notes Text Gravois Aluminum Boats Jeanerette Review Timber Yachts For Sale Tasmania Online Shop |
